Docker brings an easy way to package your application with everything needed to run it. With Docker you don’t need to worry about the environment where your application will run, you just need a host with Docker installed to be able to run your application.
But now that you have dockerized your application, you need to run it in production, and there are lot more things you need to think about :
- You need to manage the deployment of your docker containers
- Maybe you need to be able to scale your app by running several instances of it on mutiple hosts
- You need to manage your container configuration
- You need to ensure zero downtime deployments
- You need to ensure that your app is always ready and healthy
- …
All these needs can be adressed by container orchestrators. Kubernetes is a container orchestrator open-sourced by google. It supports several container runtimes. As docker is widely used, I will rely on it for the rest of the article.
To illustrate some of the capabilities of Kubernetes, we will deploy a java application on a local Kubernetes install. We will use the Spring pet clinic application as example. It will consists of :
- A REST Api : https://github.com/spring-petclinic/spring-petclinic-rest.git
- A front Angular webapp : https://github.com/spring-petclinic/spring-petclinic-angular.git
So let’s begin by dockerizing our application.
Run the application with Docker
I have built images for each of the two github projets listed above and pushed them in dockerhub as a starting point.
Here is the docker-compose.yaml file I use to run my application on my localhost :
version: '3.2'
services:
  api:
    image: marem/springpetclinic_api
    ports:
      - 9966:9966
    networks:
      - spring-petclinic
  front:
    image: marem/springpetclinic_front
    depends_on:
      - api
    ports:
      - 8081:8081
    networks:
      - spring-petclinic
networks:
    spring-petclinic:
It’s a stack compound of 2 services :
- api : this service is based on the
marem/springpetclinic_apiimage and will be mapped on9966local port. - front : this service is based on the
marem/springpetclinic_frontimage and will be mapped on8081local port. It depends onapiservice.
To start our stack, use the following command :
# start the containers
➜ docker-compose up -d

# check that containers are running
➜ docker ps
CONTAINER ID        IMAGE                         COMMAND                  CREATED             STATUS              PORTS                              NAMES
0bd037c4c63e        marem/springpetclinic_front   "nginx -g 'daemon of…"   17 minutes ago      Up 11 minutes       80/tcp, 0.0.0.0:8081->8081/tcp     petclinic_front_1
91a2cdcd2d1b        marem/springpetclinic_api     "java -jar spring-pe…"   About an hour ago   Up 11 minutes       8080/tcp, 0.0.0.0:9966->9966/tcp   petclinic_api_1
The application is now accessible with the following link : http://localhost:8081
Ok, that’s cool. Let’s see now how to run and manage the deployment of our stack with kubernetes.
Deploy on Kubernetes
Prerequisite : kubernetes cluster
If you have no kubernetes cluster to run your apps, you can install minikube. Minikube acts as a local kubernetes cluster composed of a single worker node. Once minikube is installed, you can start it with the following command :
➜ minikube start
Starting local Kubernetes v1.9.0 cluster...
Starting VM...
Getting VM IP address...
Moving files into cluster...
Setting up certs...
Connecting to cluster...
Setting up kubeconfig...
Starting cluster components...
Kubectl is now configured to use the cluster.
Loading cached images from config file.

# Check minikube is running
➜ minikube status
minikube: Running
cluster: Running
kubectl: Correctly Configured: pointing to minikube-vm at 192.168.99.100
Deployment
You are now ready to deploy your app on your kubernetes cluster. Here is a command to run the petclinic api image :
kubectl run petclinicapi --image=marem/springpetclinic_api:latest --port 8080By running this command, Kubernetes will create these objects for you :
- deployment : describes what will be deployed and how it will be deployed
- pod : the runtime unit. A pod wrap containers (usually one, although it can contains severals).
You can have more information about these objects by running the kubectl describe command :
# Describe petclinicapi deployment
kubectl describe deployment petclinicapi

# Describe all pods
kubectl describe pod
Let’s check the logs of our deployed pod :
# List pods
kubectl get pods
➜  kubectl get pods
NAME                                   READY     STATUS    RESTARTS   AGE
...
petclinicapi-55cbc7fdcc-x94cb          1/1       Running   0          2d

# Tail the logs of given pod
kubectl logs petclinicapi-55cbc7fdcc-x94cb -f
Service exposition
Your pod is ready, and it has his own ip address. But if I recreate my pod, the new pod will have an other ip address. Also if I scale my deployment, I will have several pods and I will need kind of loadbalancer in front of my pods to answer the incoming requests.
Enter kubernetes services : services are the kubernetes object to expose your pods inside the cluster. It can also expose the pods to the outside world.
There are different kind of services. Among the different types :
- NodePort : binds your service on each node’s IP on a static port on your cluster ip (NodePort).
- LoadBalancer : load balancer ip behind your pods
Here, we will create a nodePort service to expose our petclinic pod :
➜  kubectl expose deployment/petclinicapi --type="NodePort" --port 9966
➜  kubectl get service
NAME           TYPE        CLUSTER-IP      EXTERNAL-IP   PORT(S)          AGE
...
petclinicapi   NodePort    10.109.35.249   <none>        9966:30526/TCP   2d
Note that it has been mapped on your cluster ip with an auto-assigned port (30526 in my case). The petclinic api is now reachable and you can check in your browser (adapt the port with the one allocated to your service) : http://{cluster-ip}:{node-port}/petclinic/
In my case : http://192.168.99.100:30526/petclinic/
Visualize with kubernetes dashboard
Kubernetes has a simple dashboard to visualize and administrate your kubernetes objects.
# Launch the dashboard in your browser
➜ minikube dashboard

# Or get the dashboard url
➜ minikube dashboard --url
http://192.168.99.100:30000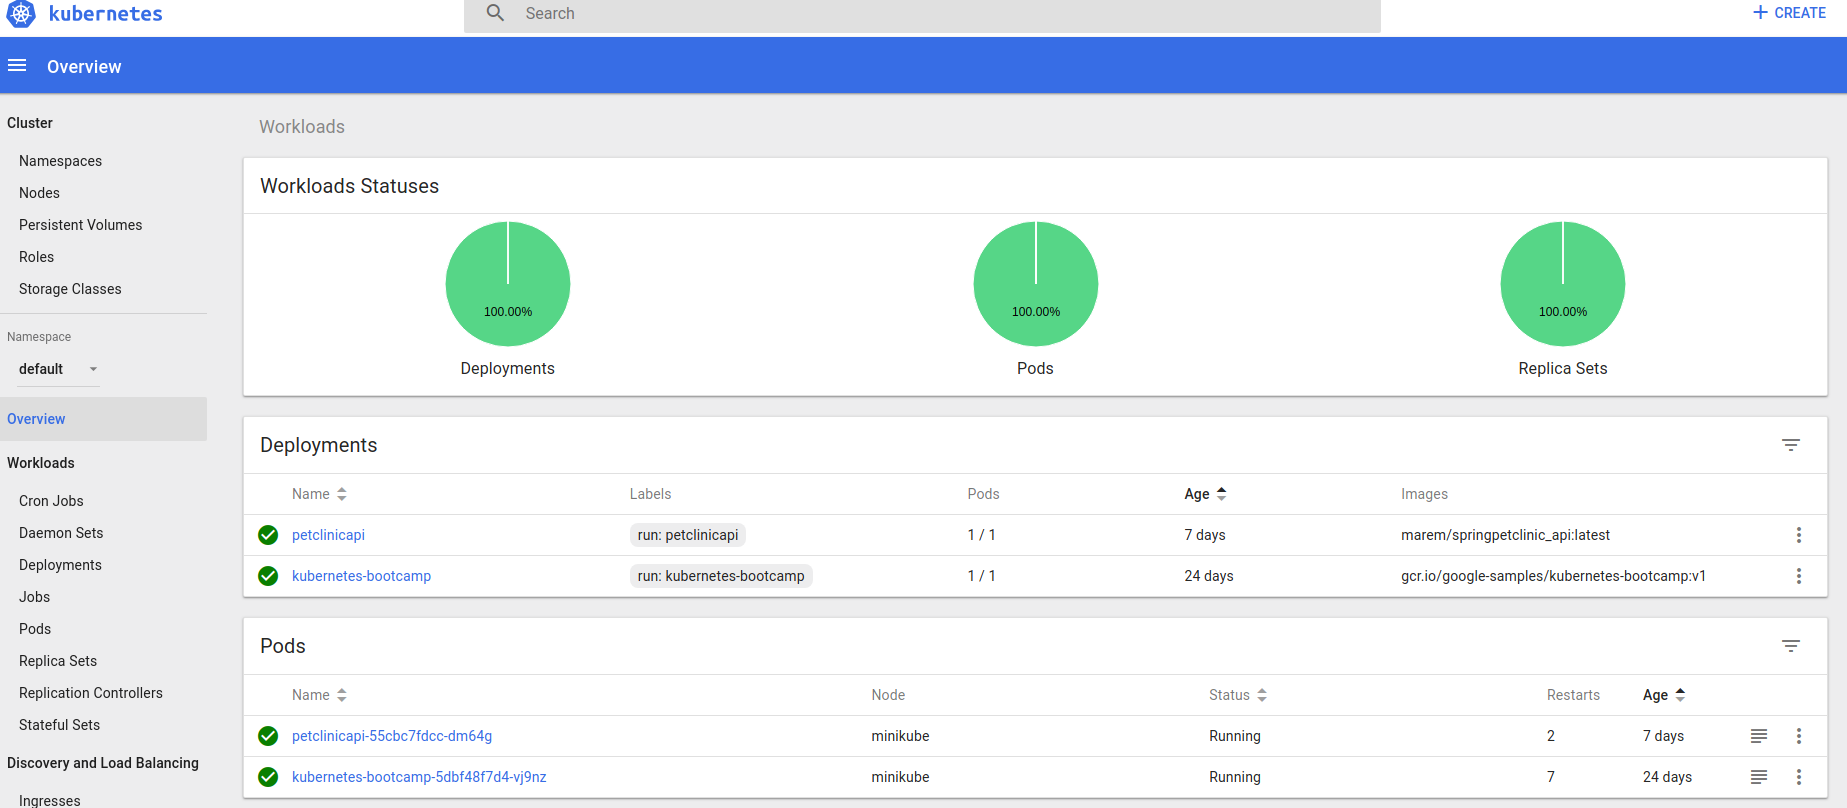
Conclusion
In this post, we deployed a springboot petclinic api server to introduce Kubernetes concepts. In the next posts I will continue to explore kubernetes features applied to springboot petclinic application :
- Deploy the full application (front + back)
- scale the application
- Use declarative way to create/update your kubernetes objects
- Use Helm to scaffold your application